
Vitest旨在将自己定位为Vite项目的首选测试框架,在Vite项目中使用Vitest可以共享相同的插件和 vite.config.js。因为我们的组件库是基于Vite开发的,所以选择了Vitest作为组件库的单元测试框架。看完这篇文章你将学会如何在Vite项目中引入Vitest和编写一些测试代码,包括对Vue组件的测试。
因为我们测试的是运行于dom上的组件库,所以我们不仅要安装vitest还有安装happy-dom(模拟Web浏览器,以便用于测试的工具)以及c8(用了展示测试覆盖率)。
pnpm add vitest happy-dom c8 -D -w
我们可以在vite.config.ts 的test属性下进行vitest的相关配置。配置之前我们需要在文件顶部配置三斜线命令告诉编译器在编译过程中要引入的额外的文件
///import { defineConfig } from "vite"; import vue from "@vitejs/plugin-vue" ... export default defineConfig( { ... test: { environment: "happy-dom" }, } )
然后在package.json中添加两条命令
... "scripts": { "test": "vitest", "coverage": "vitest run --coverage" } ...
执行pnpm run test的时候,vitest会寻找**/*.{test,spec}.{js,mjs,cjs,ts,mts,cts,jsx,tsx}形式的文件。所以我们新建button.test.ts,写个简单的2+2=4的测试代码。其中
decribe会形成一个作用域import { describe, expect, it } from "vitest"; describe("two plus two is four", () => { it("should be 4", () => { expect(2 + 2).toBe(4) }) })
然后终端执行pnpm run test,则会出现一些结果
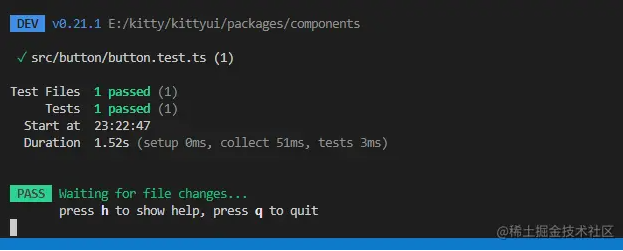
并且开启了热更新。
因为我们的项目主要是组件库,所以组件则是我们主要测试的东西。首先我们要安装Vue推荐的测试库@vue/test-utils
pnpm add @vue/test-utils -D -w
这个工具主要提供了一个mount方法,我们通过mount实例化一个组件,传入不同参数来测试组件是否符合我们的预期,比如我们为我们Button组件的写一段测试插槽的代码,一般组件测试文件会放在__tests__文件夹下,所以物品们在src/button/__tests__新建button.test.ts
import { describe, expect, it } from "vitest"; import { mount } from '@vue/test-utils' import button from '../button.vue' // The component to test describe('test Button', () => { it("should render slot", () => { const wrapper = mount(button, { slots: { default: 'Hello world' } }) // Assert the rendered text of the component expect(wrapper.text()).toContain('Hello world') }) })
这段测试代码的含义是
当我们默认插槽为"Hello world"时,期望这个组件的text包含"Hello world"
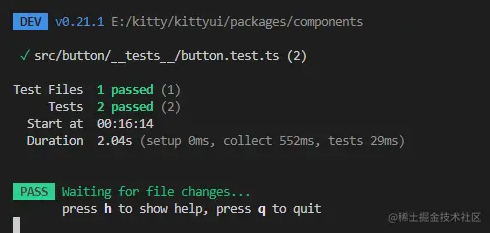
然后我们执行pnpm run test,我们会发现我们Button组件的,默认slot测试通过了

如果我们要测试Button组件传入不同type展示不同样式,我们可以加一段个测试type的代码
import { describe, expect, it } from "vitest"; import { mount } from '@vue/test-utils' import button from '../button.vue' // The component to test describe('test Button', () => { it("should render slot", () => { const wrapper = mount(button, { slots: { default: 'Hello world' } }) // Assert the rendered text of the component expect(wrapper.text()).toContain('Hello world') }) it("should have class", () => { const wrapper = mount(button, { props: { type: 'primary' } }) expect(wrapper.classes()).toContain('k-button--primary') }) })
这段测试type代码的含义是
当我们传入的组件的type为primary,期望渲染出的组件包含'k-button--primary'的类名
然后执行pnpm run test,会发现两条测试都通过了
其中关于组件的测试方式还有许多,这里就不再一一举例了,感兴趣的可以到官网Vue Test Utils 查看
最后我们可以执行pnpm run coverage来查看我们测试的覆盖情况
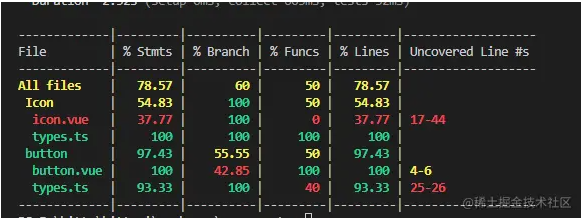
它们的含义分别是
到这里我们组件库便完成了Vitest组件库的引入,可能未来要做的还有很多,但至少我们已经跨出了第一步。
如果你想直接使用组件库的话,可以点击 kittyui 获取最新组件库代码,然后执行如下操作即可
如果你对组件库开发感兴趣的话可以关注 从零搭建Vue3组件库-专栏,后续将不断完善组件库。
Copyright © 2023 leiyu.cn. All Rights Reserved. 磊宇云计算 版权所有 许可证编号:B1-20233142/B2-20230630 山东磊宇云计算有限公司 鲁ICP备2020045424号
磊宇云计算致力于以最 “绿色节能” 的方式,让每一位上云的客户成为全球绿色节能和降低碳排放的贡献者

